An outside tap is a real bonus when it comes to watering the garden or filling buckets for washing the car or cleaning windows.
Fitting a garden tap is not difficult, but you will need to turn the water off and drill a largish hole through the wall to take the pipe.
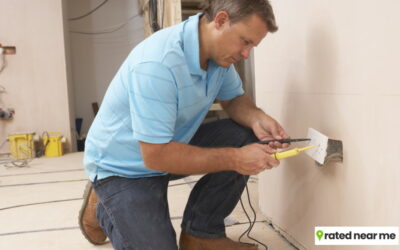
Outside Tap Pipe & Fittings
A garden tap is connected to the mains pressure water supply – either to the rising main (which runs from the main stop-cock to the cold-water cistern in the loft) or to the ‘branch’ pipe, which runs to the kitchen cold water tap.
The connection is made by cutting out a section of the cold water pipe and then running more pipe to the position of the outside tap.
There is a choice of both pipe and fittings: for the pipe you can use copper, hand-bendable copper or semi-flexible plastic.
Copper Pipe
Copper pipe is the cheapest and it is the traditional material, but it is difficult to bend, so requires exact measuring and the use of elbow fittings to take it round comers.
Hand-bendable copper has corrugated walls, making it much easier to bend, but you need to be able to use standard lengths.
Plastic Pipe
Semi-flexible plastic is easy to cut and to bend and saves on fittings. For the fittings you can use compression, capillary or push-fit. Compression fittings require the use of two spanners to tighten the nuts and are obtrusive.
When used with plastic pipe, special pipe inserts (metal or plastic) need to be used to support the pipe wall.
Pipe Fittings
Capillary fittings (copper pipe only) are cheaper and less obtrusive than compression fittings, but require much more skill to make property.
Push-fit fittings (available in plastic) are the most expensive but the easiest to use and will allow the pipe to rotate in the fitting even once the joint has been made.
The type of tap you need is a bib’ tap — that is, ore with a horizontal inlet. The most durable finish is brass.
Step-by-Step Outside Tap Guide
Step 1
Turn the water off at the stopcock on the rising main water supply (usually found under the kitchen sink). You will still have water in the cold-water cistern for washing and flushing loos, but there will be no fresh cold water at the kitchen sink while you do the job, so fill the kettle before you start.
Step 2
Choose the position of the outdoor tap. This will depend on the proximity of suitable pipes to connect to, but the best position is usually on the outside wall immediately above the gulley into which the kitchen sink discharges (if you have one).
Allow at least 350mm of straight horizontal pipe run inside house (to allow space for the stopcock and double-check valve) and, if you can, make the connection around 150mm above the proposed outdoor tap position.
Remember that the outside tap needs to be high enough to get a watering can or bucket underneath – typically around 600mm (2ft) above the ground.
Step 3
Mark the pipe (rising main or kitchen cold water supply branch) where you are going to cut it and make two cuts approximately 10mm apart.
If you have room, use pipe cutters, which give a much neater cut; alternatively, use a hacksaw, concentrating on keeping the cut square.
Use a small half-round file to clean up the cut ends of pipe both inside and outside, and clean the surface of the pipe with wire wool.
Step 4
Fit a 15mm compression tee to the cut ends of the pipe – this could involve manoeuvring the pipe slightly to get the pipe ends into the fitting.
Remember to fit the nut and ‘olive’ over the pipe before putting the pipe end into the fitting.
Tighten the nuts. using one spanner to hold the fifing and the other to tighten the nut.
Step 5
Drill a hole in the wall where you want the outside tap.
This will involve some careful measuring on the inside and the outside and, if you are making the connection inside a kitchen cupboard, you might have to cut a disc out of the cupboard backing with a holesaw first.
Drill the hole from the inside, using a 16mm masonry drill bit in an electric hammer drill.
Step 6
From the compression tee, run 15mm pipe first to an isolating stopcock and then to a double-check valve (required by the water byelaws). These will both have compression fittings, which are tightened as before.
From the double-check valve, run more pipe to the hole in the wall, using elbow fittings or bending the pipe as appropriate.
Outside taps need to be drained in the winter (to prevent the water in the pipe freezing) and there are two ways you can achieve this:
Option 1 – If the connection to the rising main or kitchen cold tap branch pipe is above the level of the tap, the pipe will run down to the tap and the tap itself can be used to drain the pipe with the isolating stopcock (also known as an “in line service valve”) turned off.
Option 2 – If the connection is below the tap, a draincock elbow should be fitted outside where the pipe turns up to run to the tap.
Fit pipe clips to support the pipe as necessary.
Step 7
The outside tap is secured to the outside wall with a compression wall plate elbow. This has three holes to take brass screws, a compression fitting to take the pipe and a threaded hole into which the tap is screwed.
Mark the position of the wall plate elbow on the wall and drill the holes. Insert the wall plugs.
Cut and fit the last piece of pipe leading to the elbow and then secure the elbow in place.
Finally screw in the tap, using PTFE tape around the threads wound in a clockwise direction.
Step 8
You should make good any damage around the hole on the outside with non-setting mastic (extensive damage might need repairing with mortar) and fit waterproof pipe insulation over the exposed pipe on the outside.
Turn the water on and check for leaks; if necessary, tighten any compression fittings, but do not overtighten them.
Fitting A Garden Tap Checklist
| Tools Needed | |
|---|---|
| Tape measure | Electric hammer drill |
| Pencil | Small half-round file |
| Pipe cutter or hacksaw | Wire wool |
| Two adjustable spanners | Blowlamp and flux (if using capillary fittings) |
| Holesaw | Screwdriver |
| Long 16mm masonry drill | Small masonry drill (for wallplugs) |
| Materials Needed | |
|---|---|
| Stopcock | 3.5in brass No 8 round-head screws |
| Double-check valve | Wall plugs |
| 15mm compression tee fitting | Plastic or brass garden tap |
| 15mm pipe | Draincock |
| 15mm elbow fittings | Pipe insulation |
| 15mm wall plate | PTFE tape |
| Compression elbow | Pipe clips |
| Non-setting mastic |
Video On How To Fit Outdoor Tap
The video below shows each step of fitting an outdoor tap. Watch the video to get tips on how to do it yourself.
Professional Plumbing Help
If you are unsure on how to fit an outside tap, or do not feel confident that you can undertake the outlined tasks (bear in mind you are dealing with byelaws), then we always recommend that you seek the help of an experienced plumber who can fit an outside tap for you.