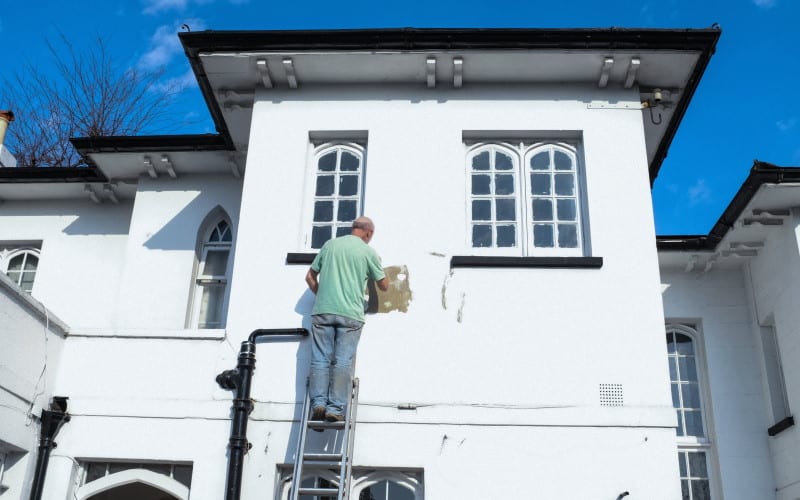
Are the outside walls of your house looking the worse for wear? If so, perhaps it is time they had a new coat of paint.
Not all house walls need painting. For example, if you have good-quality facing bricks, which are looking good and are keeping out the weather, then leave them alone.
But many houses have walls that have been rendered (i.e. covered with a sand/cement “plaster”) or pebble-dashed (a finish of sand/cement render with stones thrown at the surface). For these walls, applying an exterior wall paint will much improve the appearance.
A rendered surface (often used to cover up poor-quality brickwork) will usually have been painted from day one.
Many pebble dashed finishes (common until 1939) will have been left bare initially, but will now have eroded, causing stones to drop out, so a coating is required to prevent further erosion.
Once you start to paint exterior walls, you will probably have to repeat the same exercise in the future to keep them looking good.
Painting Checklist
| Tools needed: | Materials needed: |
|---|---|
| Stiff bristle brush | Masonry paint |
| Scraper | Fungicide wash |
| Pressure washer (if required) | Stabilising solution |
| Filling knife | Masonry filler |
| Plastering trowel (float) | Masking tape |
| Large brush or paint roller | Sand and cement (for render repairs) |
| Wire brush |
Types Of Exterior Wall Paint
The type of pant that you can use for coating the outside of your home is masonry paint. It is ready-mixed and is normally a water borne emulsion, containing a fungicide (as normal emulsion paints are not suitable for external use).
Masonry paint is reinforced with sand, stone, granite or fibre, and it is this reinforcement that gives it the ability to fill in and disguise narrow cracks and small holes in the external rendering of your home.
This special type of exterior paint is usually available in a choice of smooth and fine-textured finishes. The textured masonry paint goes on twice as thick as the smooth version, so it has better crack filling properties and is likely to last longer.
Gloss-finish masonry paints are also available for highlighting architectural details – such as stone sills, lintels and porticos.
Access And Safety
In order to paint exterior walls of your house, you will need some proper access equipment. A good-quality extension ladder could be used, but this will need moving frequently and will need to be secured at each position to ensure your safety.
A ladder stand-off, which positions the top of the ladder away from the wall, allows more room to work.

A better solution than a ladder, especially if you are painting large areas, is to hire a scaffold tower, which provides a larger, safer and more comfortable working area.
It can also can be wheeled around the house as required. As with working on a ladder, do not attempt to over reach – just work on the areas that are at arm’s length and then move the tower.
You can find tower scaffold hire costs here.
Wear protective gloves and goggles when cleaning the wall surface and when applying the paint. It might be wise to wear old clothes too.
Use plastic sheets to cover up plants in flowerbeds next to the house.
Also protect tarmac drives or resin driveways from paint splashes, because these will be difficult to remove once dry.
Preparing Exterior Wall Surfaces
Before painting the outside walls of your home, it is vital that they are property prepared.
First of all, the wall should be cleaned and all loose paint or other material removed.
Old flaking paint should be taken off with a stiff bristle brush or scraper. Sometimes, a high-pressure water jet may be necessary to remove the old finish, but these can usually be hired.
Any organic growth (moss or algae) should be scraped away and the affected area sterilised by brushing on a coat of fungicide.
Organic growth will often be the result of a plumbing fault such as a leaking overflow or gutter. The problem could simply be that a gutter has become blocked with leaves, so make sure that this is rectified before the walls are painted.
If painting over brick, make sure that the mortar joints are in good condition (if not, repoint them – check out the repointing guide here) and, if a wall surface is powdery, use a stabilising solution to hold it together.
Some types of brick should not be painted – so it’s best to ask a builder for advice.
Dealing With Damaged Walls
Damaged areas of rendering should be repaired. Small gaps and cracks can be repaired with an exterior grade filler, applied with a flat-blade filling knife or plastering trowel (float). But larger areas should be repaired with a render of one part cement to six parts plastering sand, mixed with water.
For better adhesion, dampen the damaged area before applying the render and apply two coats: ‘scratching’ the first coat and smoothing off the second coat level with the surface.
Where the damaged area is wider than the size of the filling knife or trowel, you should use a length of wood to get the surface level.
If you have movement cracks – typically at the corners of window and door frames – use a crack repair tape to reinforce the filler or render repair.
For a pebble dash finish, throw some stones of the same size and shape at the surface while the render is wet. Don’t worry if only a few of them stick, but don’t use the dirty ones again without washing them.
Applying The Masonry Paint
Once the basic surface has been prepared, put masking tape around door frames and mask windows (and any other exterior woodwork) to prevent the wall paint getting onto them.
Fit a removable cardboard and tape mask around the drainpipes. Then measure up to see how much paint you will need. Consider buying extra exterior paint so you know you have enough paint to finish the job.
Masonry paint can be applied with a large brush or a roller – the best type of brush to use is one specifically designed for masonry paint, because a normal paint brush will wear out quickly.
Masonry paint can give a very even finish. No priming is necessary (other than the application of a stabilising solution on powdery surfaces), but you need two coats of paint.
On porous surfaces, the first coat of paint should be thinned with 10% water (first check the manufacturer’s instructions).
The paint should be ready for recoating after around four hours drying time. You should be able to apply two coats in a single day.
How & When To Paint Exterior Walls
Avoid painting exterior walls with your back to the sun.
After a while it becomes extremely uncomfortable and the glare from a freshly painted white surface will make it difficult to see where you have painted.
The best way to do it – as with all exterior painting, is to “follow the sun”. By that we mean go round the house from east to west via south.
Not only will this make the painting easier, but it will also mean that the sun has had a chance to dry out parts of the wall (possibly damp from your preparation work the previous day) before you get to them.
And do not paint when it is damp or frosty.
When painting, try to keep a “wet edge” – that is, do not let the paint at the edge of the area you have just painted dry before you get to join up the next area.
Start painting at the top of the house and work in sections down to ground level, finishing at natural features such as comers and window frames, and join up the edges before the paint dries.
When you are done, make sure that all brushes and other equipment is cleaned after use.
Hire A Professional Decorator
If you are in any doubt as to how to paint an exterior wall – and given that everyone can see it, for example, neighbours and passers-by – then perhaps it’s best to find an exterior painter who will do it for you.
If you do go down this route, we have a list of top questions to ask exterior painters before you contract them to paint your walls.


